Ever wondered why your CPU temperatures seem higher than they should be? Or why that new gaming rig isn’t performing quite as expected? The answer might be hiding in plain sight – in that small dollop of thermal paste between your processor and heat sink. What appears as a minor detail in PC building is actually a critical component that bridges microscopic imperfections between metal surfaces to create an optimal thermal pathway. Get it wrong, and you’re essentially building a performance bottleneck right into your system.
The thermal interface material sits at the intersection of elegant design and practical engineering – it’s meant to fill those nanoscale voids that prevent perfect metal-to-metal contact. When applied correctly, it forms an invisible bridge that conducts heat away from your CPU or GPU efficiently. When applied incorrectly, it becomes a thermal resistor that silently throttles your performance. The difference between optimal application and common mistakes isn’t just academic – it’s the difference between a system that runs cool and quiet, and one that struggles under thermal pressure.
In high-performance computing, every degree matters. Modern processors are designed to operate within specific temperature ranges, and exceeding these limits triggers thermal throttling that reduces clock speeds to prevent damage. This means that improper thermal paste application doesn’t just affect longevity – it directly impacts your day-to-day performance in everything from productivity tasks to gaming sessions.
Is More Thermal Paste Better? Debunking the Common Misconception
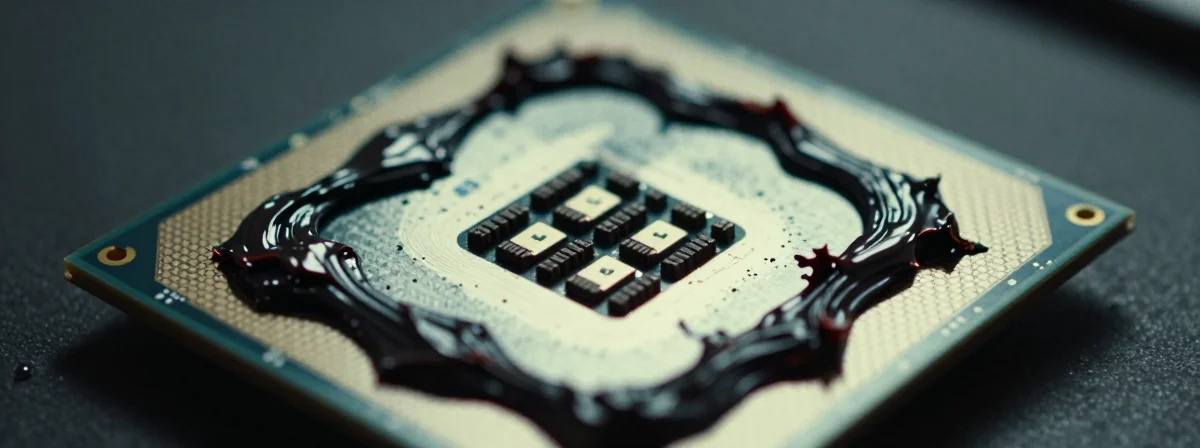
The most persistent thermal paste myth is that “more is better.” This couldn’t be further from the truth. Thermal paste isn’t a sealant; it’s a conductor. Applying excessive amounts creates a thick layer that actually insulates rather than conducts heat. Think of it like trying to cool your soup by placing a thick pillow between the bowl and the refrigerator – the pillow might be cold, but it’s too thick to transfer heat effectively.
The ideal application would involve zero paste with perfect metal-to-metal contact, but microscopic imperfections make this impossible. That’s why we use thermal paste – to fill those tiny valleys and create a continuous thermal path. When you apply too much, you’re essentially creating a thermal barrier that your processor has to work through rather than around. This is why experienced builders often say “a grain of rice is enough” – the paste spreads as pressure is applied, filling gaps without creating excess.
Consider this: desktop CPU heat spreaders are typically 8 times larger than laptop ones, yet require only about half the amount of paste. This highlights how the relationship between surface area and paste quantity isn’t linear. Laptop processors, which often lack integrated heat spreaders (IHS), require even more precision – the paste must be fully spread to ensure complete coverage of the exposed die.
How Much Thermal Paste Actually Do You Need? The Science Behind the Squeeze
Determining the right amount of thermal paste comes down to understanding its purpose: to fill voids, not to create a layer. For most desktop processors, a pea-sized amount (roughly 0.05-0.1 grams) is sufficient. For laptop processors, especially those without an IHS, you might need slightly more but still minimal – think half a pea to a full pea depending on die size.
The paste spreads naturally when the cooler is installed and compressed. Any excess will squeeze out from the edges, which is perfectly normal and expected. What’s important is that there’s enough to fill the microscopic gaps without creating a thick thermal barrier. Modern thermal pastes are designed to flow under pressure, so precise application isn’t as critical as avoiding extremes of too much or too little.
A useful technique is the “line method” for narrow processors or the “dot method” for wider ones. The line method involves applying a thin bead of paste along one edge of the processor, while the dot method places a small amount directly in the center. Both work well when pressure is applied evenly during cooler installation. The key is consistency – whatever method you choose, apply the same amount each time for reliable results.
Remember that thermal paste isn’t conductive (unless it’s specifically labeled as electrically conductive), so minor over-application won’t damage your components. It will, however, create a mess when the cooler is removed and waste expensive thermal material. More importantly, it creates a thermal barrier that reduces cooling efficiency, which is why precision matters even if the risks of error are relatively low.
Laptop vs Desktop: Why Your Application Technique Should Change
The thermal paste application technique for laptops differs significantly from desktops due to physical constraints and design differences. Laptop processors often operate in tighter spaces with less clearance between components, and many lack the integrated heat spreaders found in desktop CPUs. This means the paste must make direct contact with the exposed die in many cases.
When working with laptop processors without an IHS, the paste needs to be spread more evenly across the entire die surface. A common mistake is applying a single dot in the center, which can lead to incomplete coverage when space is limited. Instead, consider applying a thin, even layer or using multiple small dots to ensure complete coverage.
Laptop cooling systems also typically have less thermal mass and airflow compared to desktops, making efficient heat transfer even more critical. This means any inefficiency in thermal paste application is amplified in laptops. Additionally, laptop thermal paste applications often require more precision due to the smaller surface area and tighter tolerances.
When replacing thermal paste in laptops, it’s worth noting that second RAM slots often present similar challenges – they’re critical components that require careful attention despite their small size. Just as with thermal paste, getting these details right can make the difference between optimal performance and frustrating limitations.
The Consequences of Getting It Wrong: Beyond Just Wasted Paste
Applying thermal paste incorrectly isn’t just about wasting an expensive tube of material – it directly impacts your system’s performance and longevity. When too little paste is used, you risk incomplete coverage, leaving microscopic air gaps that act as thermal insulators. Air is a poor conductor of heat, so these gaps create hot spots that can lead to premature component failure.
Too much paste, as we’ve discussed, creates a thermal barrier that reduces heat transfer efficiency. This might seem counterintuitive – after all, isn’t more material better at conducting heat? The key difference is that paste conducts heat through its volume, while direct metal contact conducts through the solid material. Excess paste creates a thicker thermal path that your processor must work through.
The performance impact can be significant. Studies have shown that improper thermal paste application can increase CPU temperatures by 5-15°C, which may trigger thermal throttling that reduces clock speeds by 100-300MHz or more. In gaming scenarios, this can translate to frame rate drops of 10-30%, depending on the game and system configuration.
Beyond performance, there’s the longevity factor. Components operating at higher temperatures degrade faster due to increased electron mobility and accelerated chemical reactions. This means that improper cooling doesn’t just make your system slower – it potentially reduces the lifespan of your expensive processor and GPU.
Mastering the Application: Techniques That Ensure Perfect Coverage Every Time
Achieving perfect thermal paste application comes down to technique, cleanliness, and understanding your specific components. Start by ensuring both the CPU/GPU surface and the cooler base are perfectly clean and dry. Any dust, old paste residue, or moisture can create thermal barriers that undermine your efforts.
For desktop processors with an IHS, the dot method is often simplest and most effective. Place a pea-sized amount directly in the center of the processor, then install the cooler evenly, applying consistent pressure. The paste will spread naturally as the cooler compresses.
For processors without an IHS (common in some laptops and older systems), consider the spread method. Apply a thin, even layer across the entire die surface using a plastic spreader or credit card. This ensures complete coverage without creating thick spots.
A useful trick is to apply a small amount of paste to both the processor and the cooler base. This creates redundancy that ensures complete coverage even if one surface isn’t perfectly centered. Just be careful not to overdo it – the goal is to fill gaps, not create a paste sandwich.
After installation, monitor temperatures under load for the first few days. If temperatures seem higher than expected, consider reapplying – but only after ensuring proper installation technique. Remember that thermal paste needs time to cure (typically 48-72 hours) before reaching optimal performance.
When to Reapply: Signs Your Thermal Paste Needs Replacement
Knowing when to replace thermal paste is as important as knowing how to apply it. Several signs indicate it’s time for a refresh:
Noticeably higher temperatures: If your CPU or GPU temperatures have increased by 5°C or more compared to when the system was new, it’s likely time to replace the paste.
Performance degradation: If you’re experiencing unexplained performance drops or thermal throttling that wasn’t present before, degraded thermal paste could be the culprit.
After component removal: If you need to remove your CPU cooler for any reason, it’s the perfect opportunity to refresh the thermal paste.
Visual signs of degradation: If the paste appears dry, cracked, or has shifted position, it’s no longer providing optimal thermal conductivity.
Regular maintenance: For high-performance systems, consider replacing thermal paste annually as part of routine maintenance.
When replacing thermal paste, take the opportunity to clean the surfaces thoroughly. Use isopropyl alcohol (90% or higher) and a microfiber cloth to remove all old paste residue. Any remaining old paste can create thermal barriers that undermine your new application.
Beyond the Paste: Other Factors That Impact Thermal Performance
While thermal paste is critical, it’s just one component in your system’s cooling equation. Several other factors significantly impact thermal performance:
Cooler quality: A high-quality cooler with more fins, larger surface area, and better heat pipe design will outperform a mediocre cooler even with perfect thermal paste application.
Fan placement and airflow: Proper case airflow directs hot air away from components and allows cool air to reach heat sinks effectively.
Ambient temperature: Systems perform differently in varying room temperatures, so consider your environment when evaluating thermal performance.
Component placement: Components stacked closely together create thermal interference that can impact cooling efficiency.
Power limits: Some systems are intentionally thermal-limited to extend component lifespan, so higher temperatures might be normal for certain configurations.
Remember that thermal paste is just one piece of the puzzle. Optimizing your entire cooling system – from paste application to case airflow – creates a synergistic effect that maximizes cooling efficiency and system performance.
The Final Squeeze: Perfecting Your Thermal Paste Application
The journey to perfect thermal paste application begins with understanding its purpose: to fill microscopic gaps between metal surfaces, not to create a thermal barrier. Whether you’re working on a high-end desktop gaming rig or extending the life of an older laptop, the principles remain the same – precision, cleanliness, and understanding your specific components.
Start with the right amount – typically a pea-sized dollop for desktop processors and slightly more for laptop processors without an IHS. Apply cleanly, install evenly, and monitor temperatures afterward. Remember that thermal paste isn’t conductive (unless specifically labeled as such), so minor over-application won’t damage components, though it will reduce cooling efficiency and waste material.
The most important takeaway is that thermal paste application is both an art and a science. It requires technical understanding of heat transfer principles while allowing for practical application techniques that work in real-world scenarios. By mastering this small but critical detail, you unlock the full potential of your components and ensure they operate within their optimal temperature ranges for years to come.